I hope everyone had a great Memorial Day Weekend! I spent part of this weekend working on a pallet jewelry hanger. This is my third mini pallet project so far (see my previous projects Pallet Flower Vase Display and Pallet Coat Hanger) and I’ve enjoyed trying different ways to use them.
The jewelry hanger was created from a mini pallet cut in half. My brother did the cutting for this step. I had never used a circular saw before, and the thought of doing so made me nervous.
After the pallet was cut in half, I sanded all pallet surfaces with an electric sander. Splinters no thank you! I hand sanded in the in-between places that the electric sander could not reach.

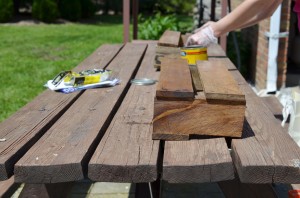
 Next, I gathered supplies to stain the wood. I used vinyl gloves, cheesecloth and wood finish. I decided to use a weathered oak finish. I prefer a vintage look in decor, and I really liked the color of this stain.
I stained the wood by dipping a section of cheesecloth into the stain, and dabbing it onto the pallet. This pallet will be hanging on the wall, so I skipped staining the back. I only used one coat of stain for my jewelry hanger, but my mom, who was my DIY partner for the day, decided to use two coats for a darker finish. I also found that different areas of wood stain differently. Since I was going for an older, rougher look, I didn’t mind.
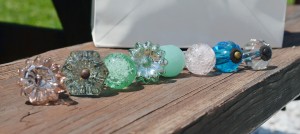
While waiting for the finish to dry (which only took around half an hour) I gathered the knobs that would be used to hang jewelry. These glass knobs are from Anthropologie and costed between $6 and $8 each. I also added in two metal knobs that I found in my family’s hodgepodge collection of knobs and handles.
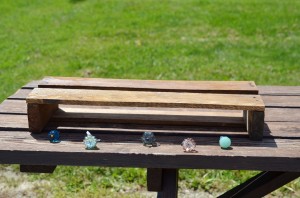
I arranged the order of my knobs (left photo)–I decided to put three on top, two on the bottom. I also decided to split up the two colored knobs and alternate with more neutral colors in between. My mom’s arrangement is picture on the right. Once I had the arrangement figured out, using a tape measure and pencil, I marked and drilled holes. That’s right…I used a drill! It was exciting stuff! I completed the project put dusting off the drill holes with a rag and inserting the knobs.
And here’s two versions of the finished product! (Above and below) I’m also considering adding smaller hooks, and possibly chicken wire in-between the wood slats to allow for more areas to store jewelry. Overall, it was a great, easy DIY project!


Wow, fantastic blog layout! How long have you been blogging for?
you made blogging look easy. The overall look of your website is excellent, let alone
the content!
LikeLike
I’ve been blogging for about a year. And thank you! 🙂
LikeLike