
 I cannot think of a more relaxing way to spend a Sunday afternoon then painting pumpkins. Painting pumpkins is seriously therapeutic! After a loaded Friday and Saturday schedule, I needed a little chill, artsy time. My mom is having a pumpkin decorating contest at the library where she works, and so these beauties are being entered into the contest today!
The Sparkles and Shine Pumpkin
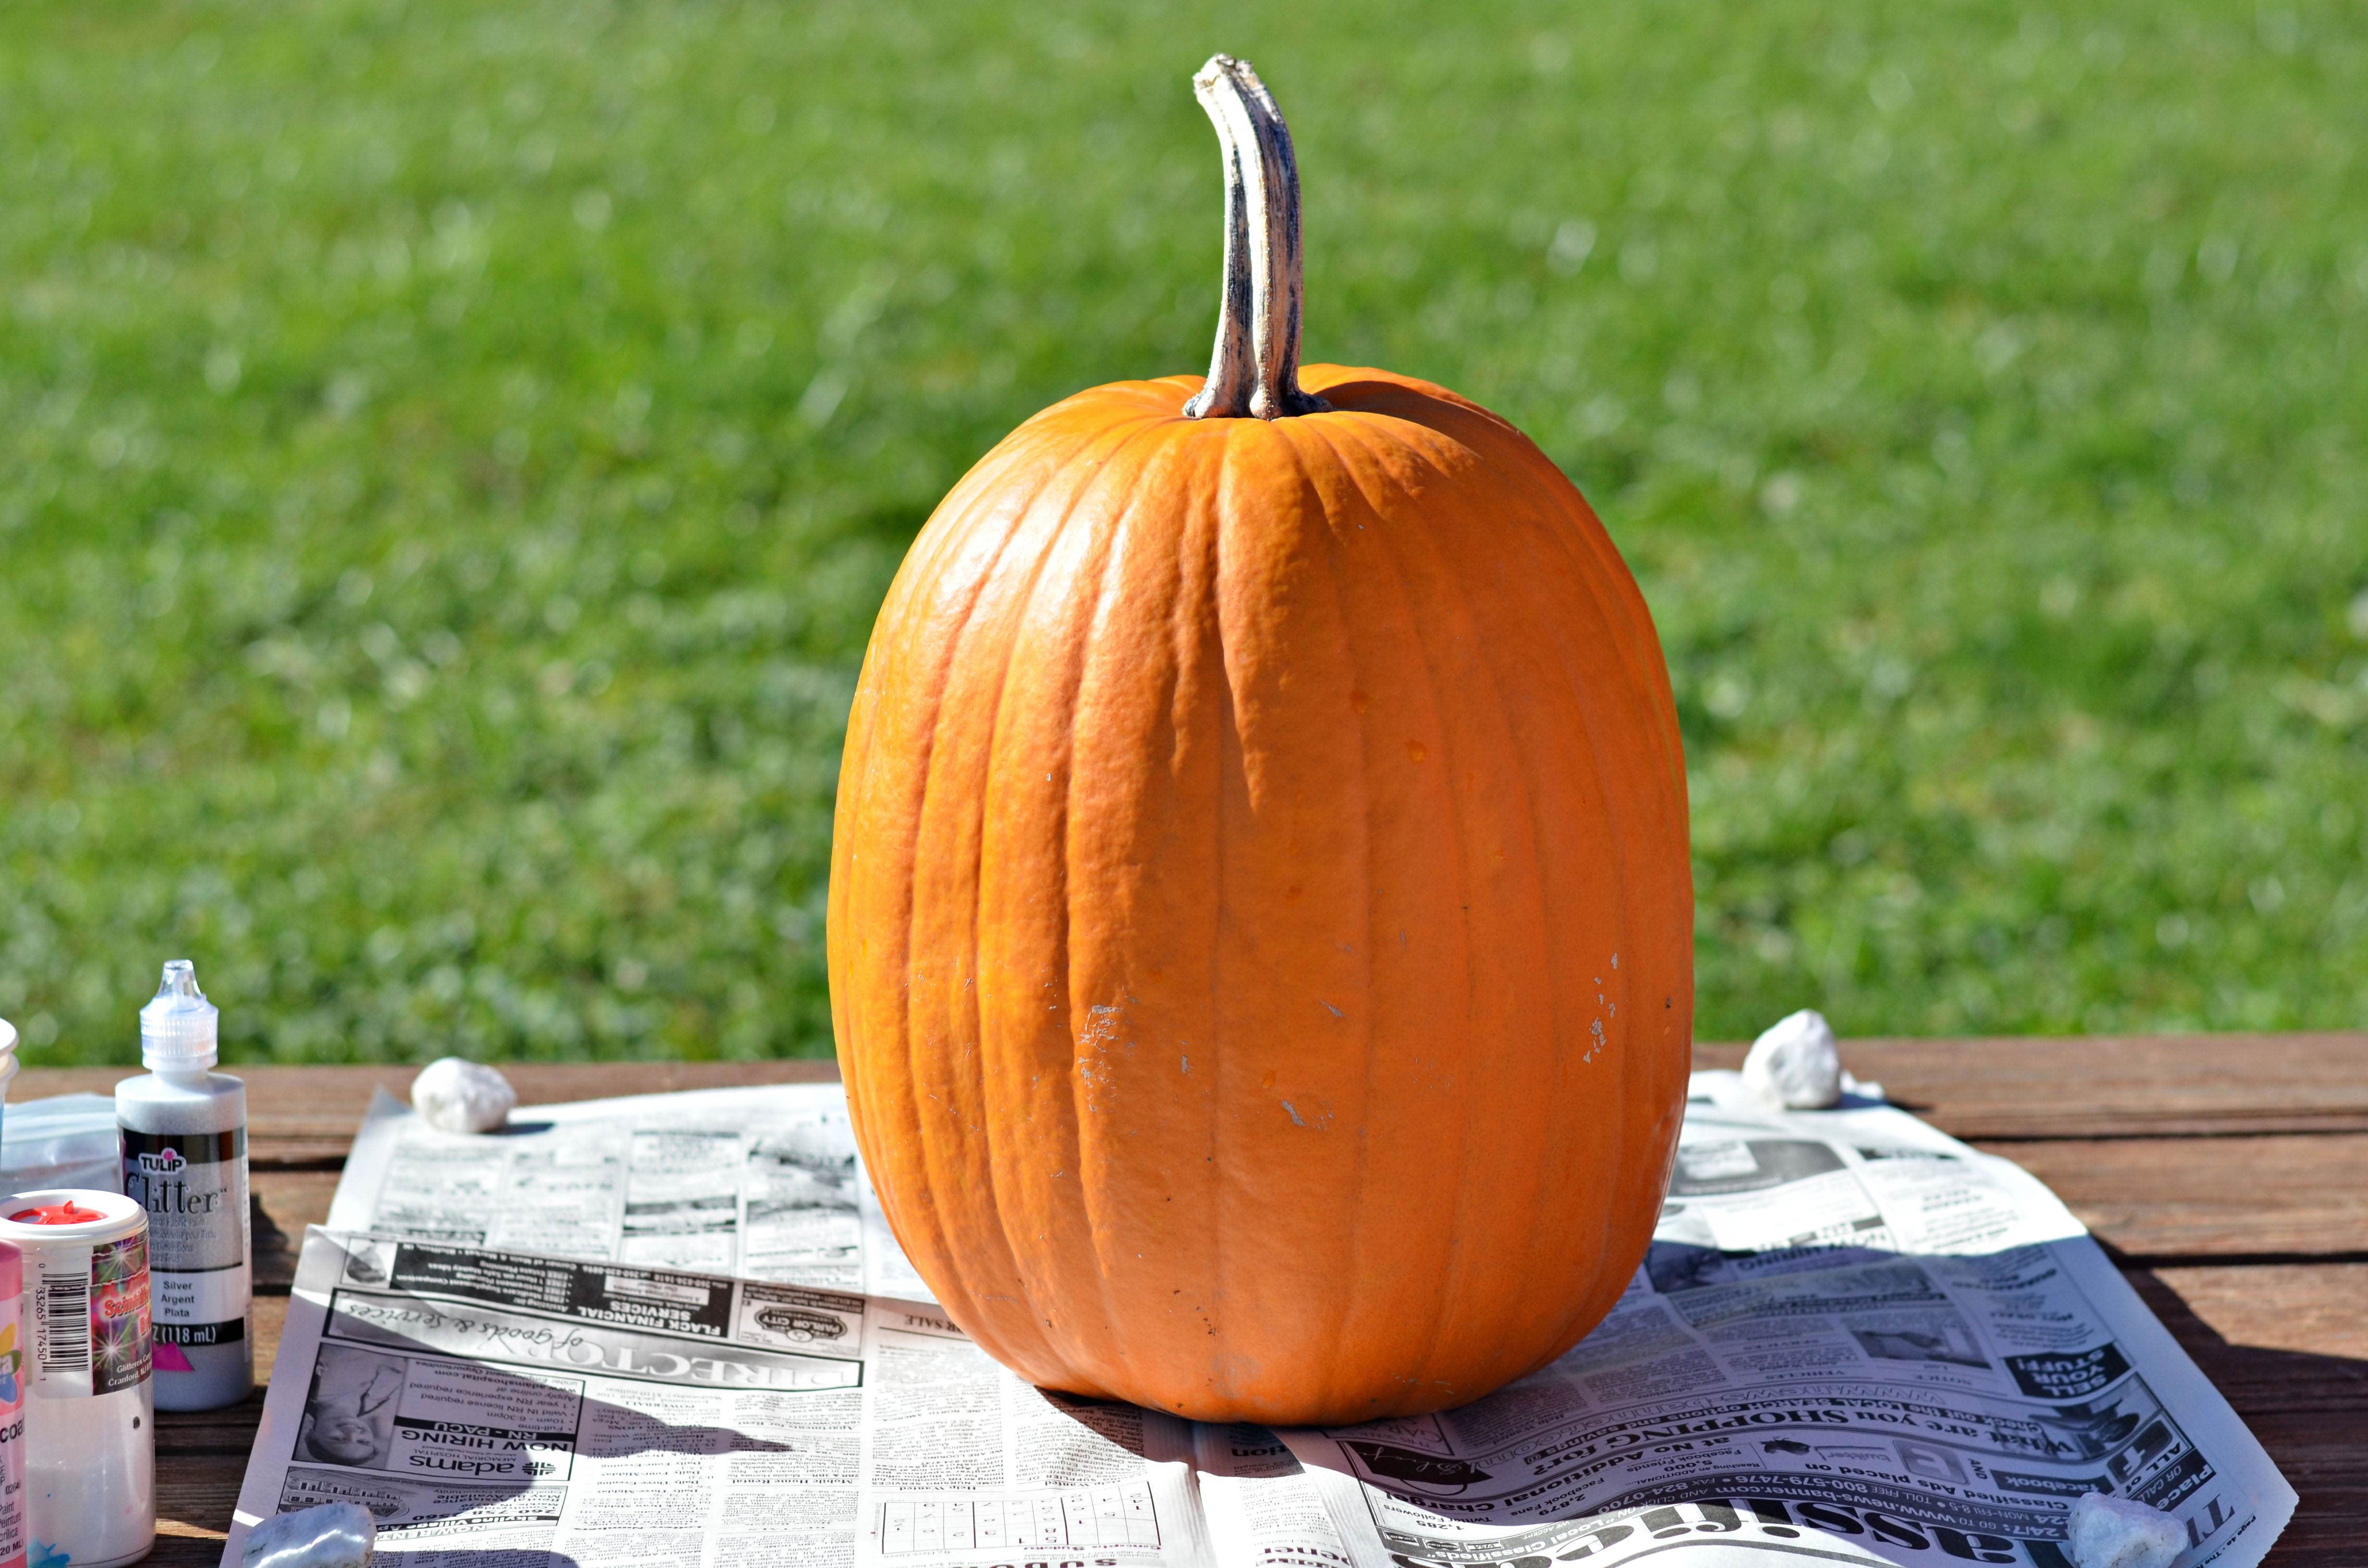
I created this decor because I like pink and I like sparkles and together, they’re the best thing to ever happen to this pumpkin. So, first grab a pumpkin (this one is home-grown by the way). And grab some newspaper, two shades of pink acrylic paint, sponge tip brushes, silver glitter fabric paint, crystal glitter and an assortment of colorful beads.
Now take the darker of the two pink shades and apply to the bottom half of the pumpkin (including the base) using a sponge tip applicator.
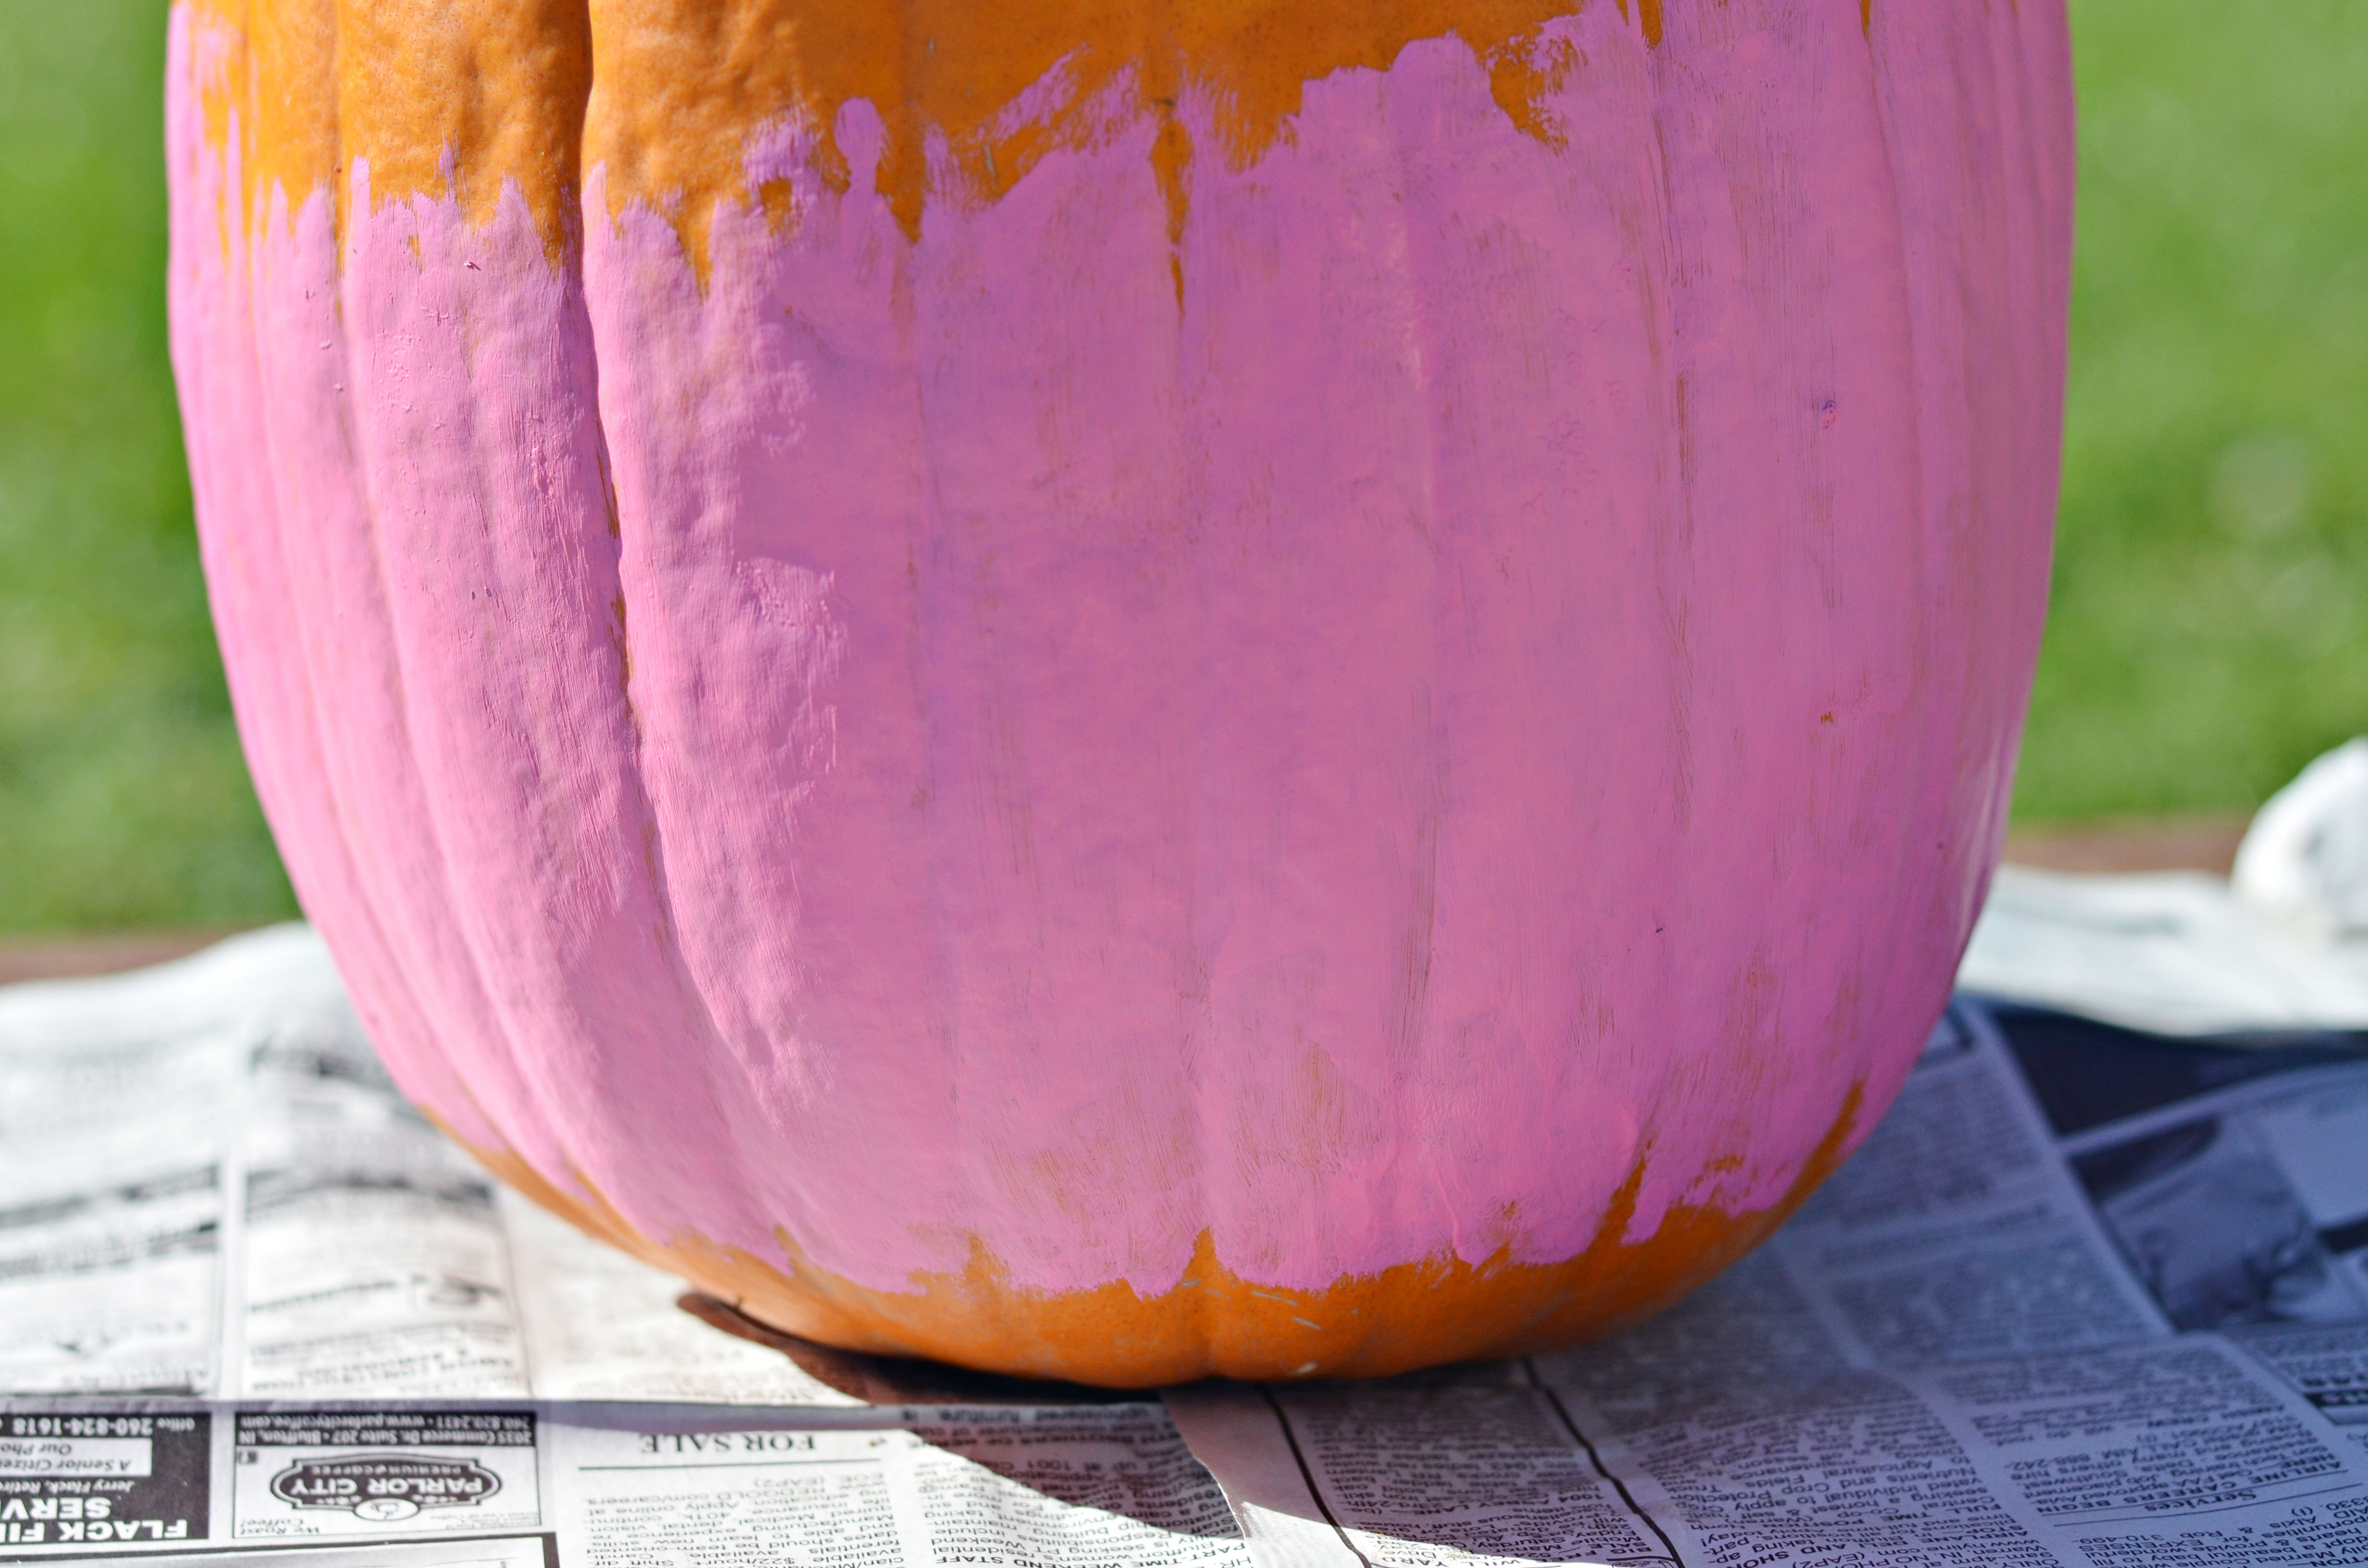
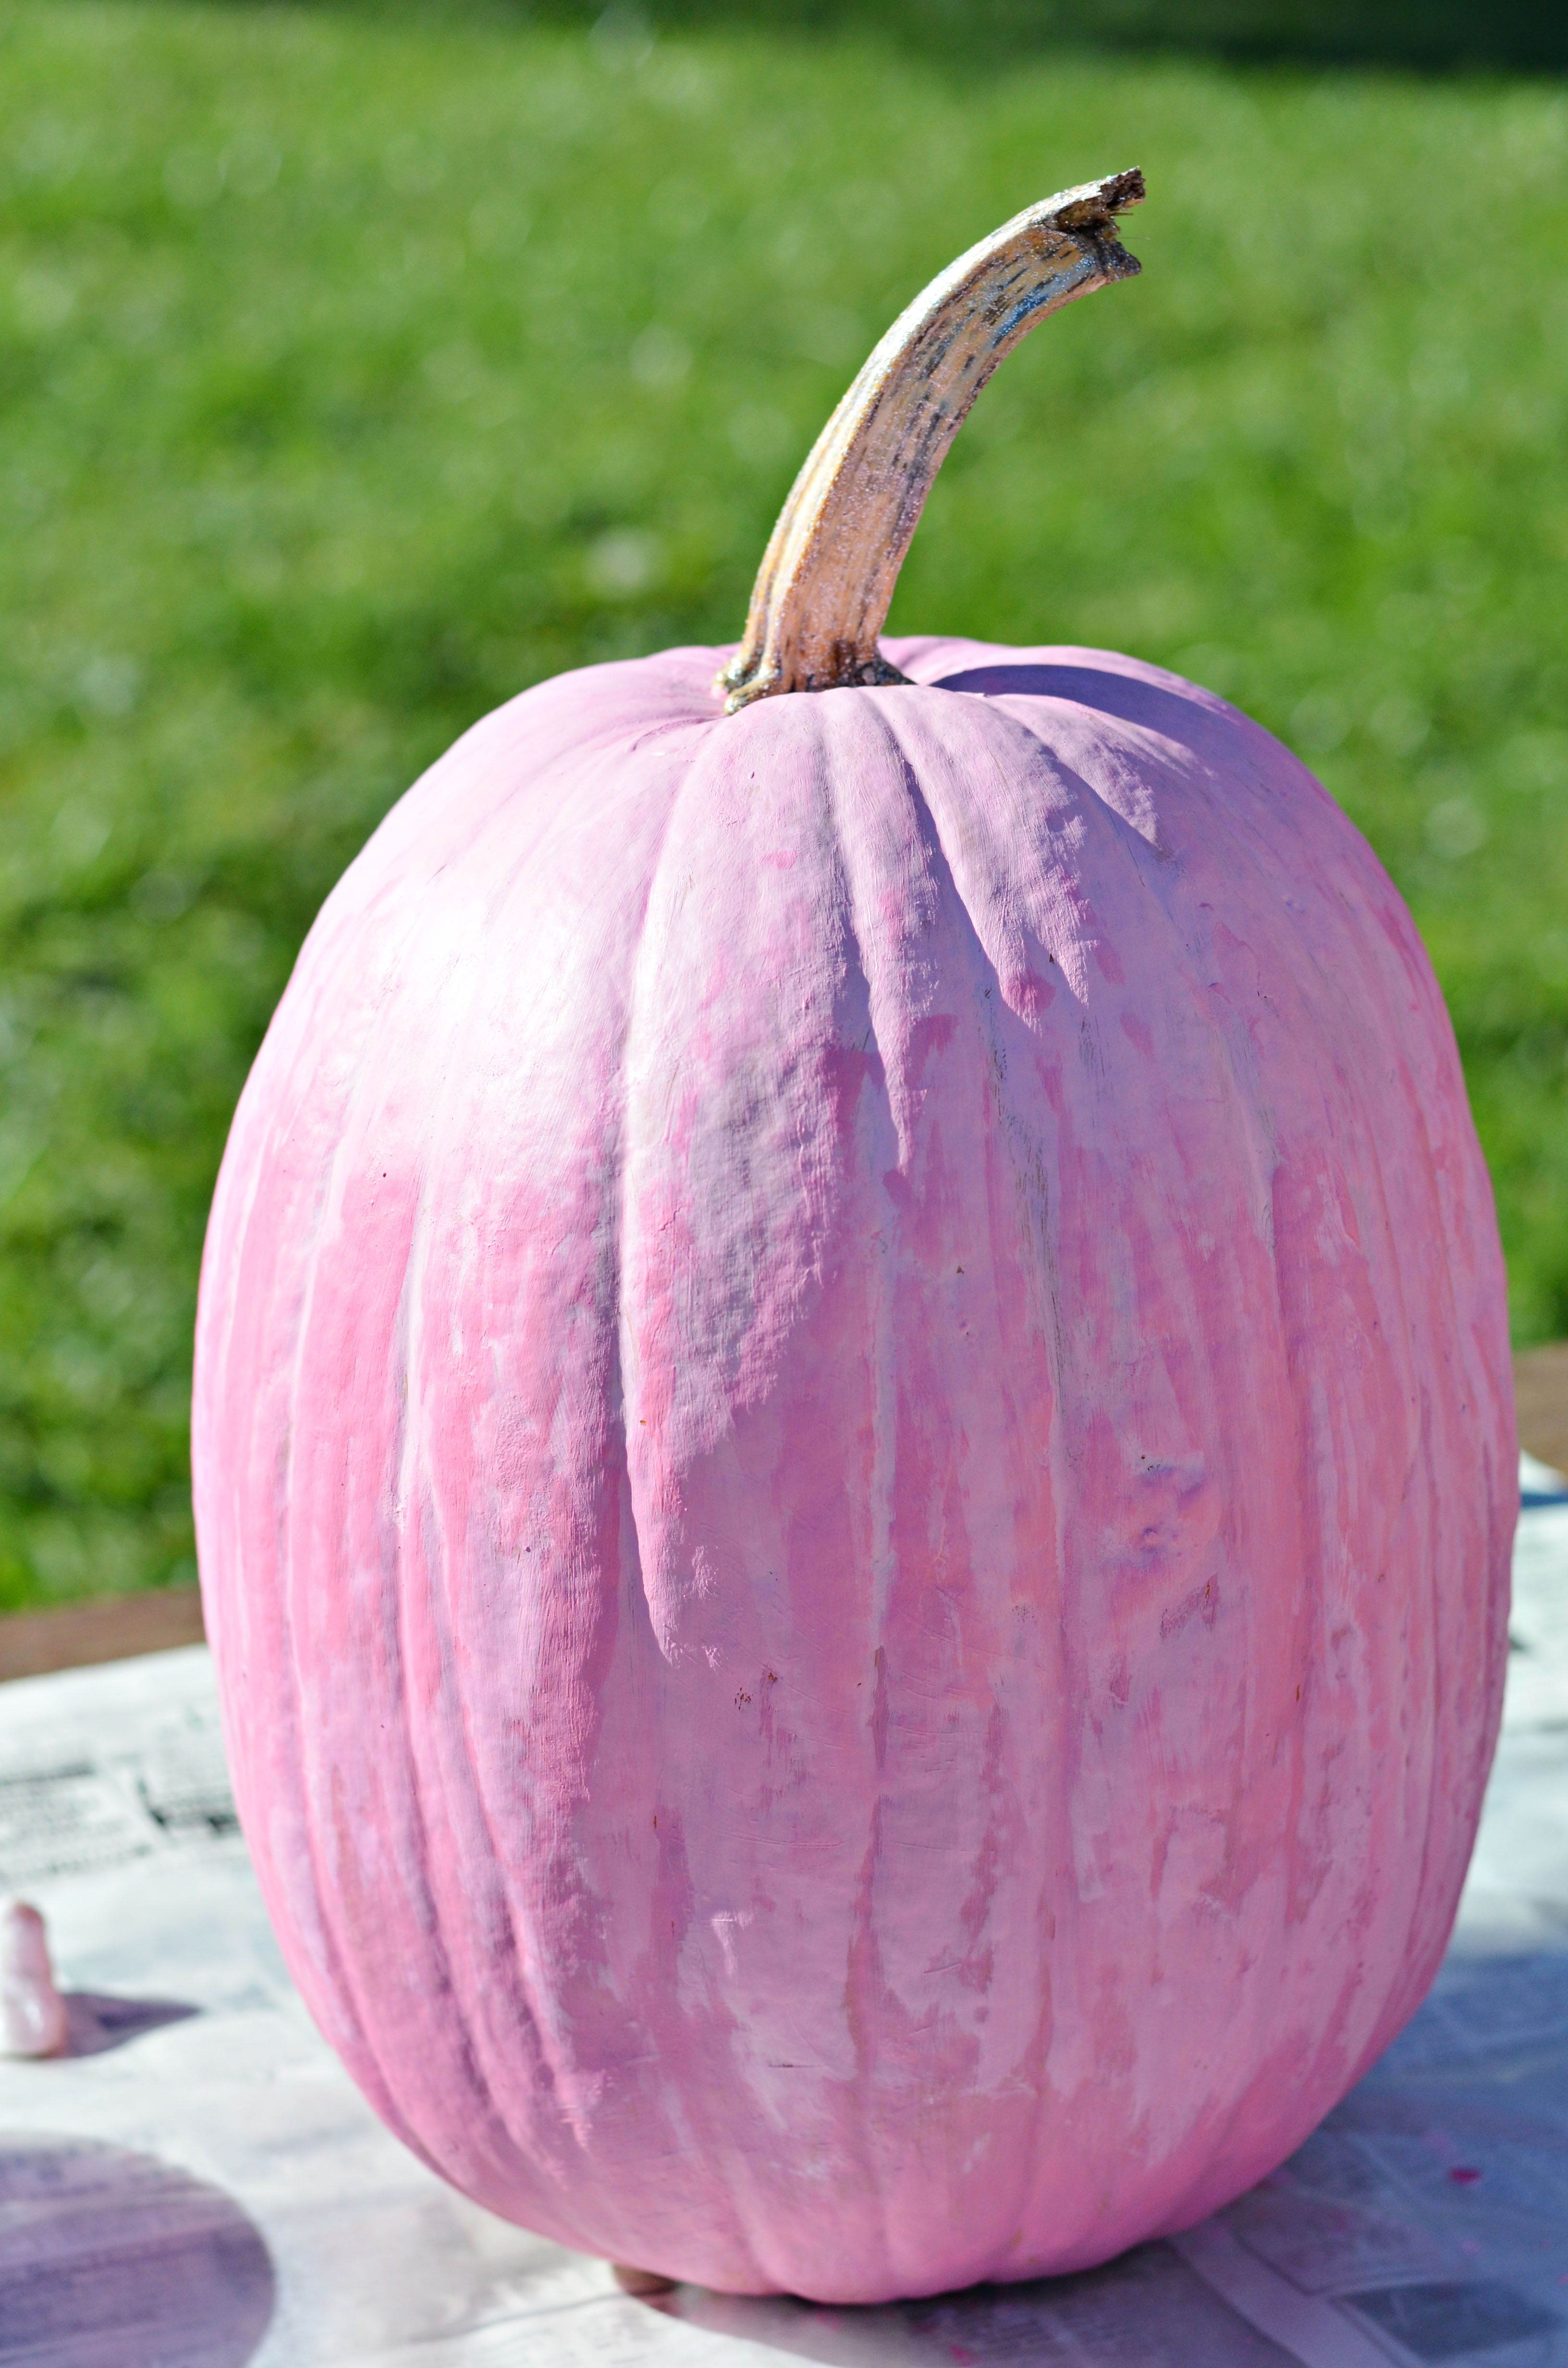
Next, apply the lighter pink shade to the top half of the pumpkin. And now for the fun part…blending!!! Without waiting for the paint to dry (we want the colors to mix!), swipe the sponge brush up and down the center of the pumpkin. The goal is to erase the harsh line of separation between the two shades. Don’t worry about keeping your strokes even, go crazy! Blend away to create a rustic pink look. While we’re at it, let’s glitterize the stem by brushing the silver glitter fabric paint over the entire surface. Before proceeding to the next step, let the pumpkin dry.

Now it’s time to make this pumpkin fabulous! I started by applying beads with silver glitter fabric paint around the stem and in strips coming down slightly over the side. Then I applied globs of the silver glitter paint in between the lines of beads, running down the sides. I adjusted the globs with a sponge brush until I achieved the fake snow-ish ( I know…it’s only October!) look I wanted. Then I took my crystal glitter and tossed it onto the globs of fabric paint. When this was over the picnic table was covered in glitter. With glitter, more is better (at least I think so).


I love all the sparkles!
For the contest my mom created a cute little display using the pumpkin as “Cinderella’s Carriage.” I didn’t have my DSLR camera with me today, so this iPhone photo will have to do!

The Classy Potted Flower Pumpkin
My mom created this guy. To start the project you first need to gut a pumpkin. The gutting is by far the most time-consuming part. Once that’s done wash your hands, save the seeds for a fantastic fall recipe and grab some supplies. For the classy pumpkin you’ll need newspaper, black acrylic paint, sponge tip brushes, silver glitter fabric paint, a potted plant, silver tissue paper and silver ribbon.

Next apply black paint with the sponge tip applicator to the entire outer surface of the pumpkin. Apply as many coats as needed to reach the black shade desired. Let dry.

It’s sparkle time! Grab the silver glitter fabric paint and a sponge brush. Apply globs of paint around the opening of the pumpkin. Brush downward in uneven strokes, leaving occasional globs of paint untouched. The glitter should look like it is falling down from the opening of the pumpkin. Allow the paint to dry.

Now all that’s left to do is line the inside with silver tissue paper, insert the potted plant (don’t forget to water it!) and style with a silver bow.
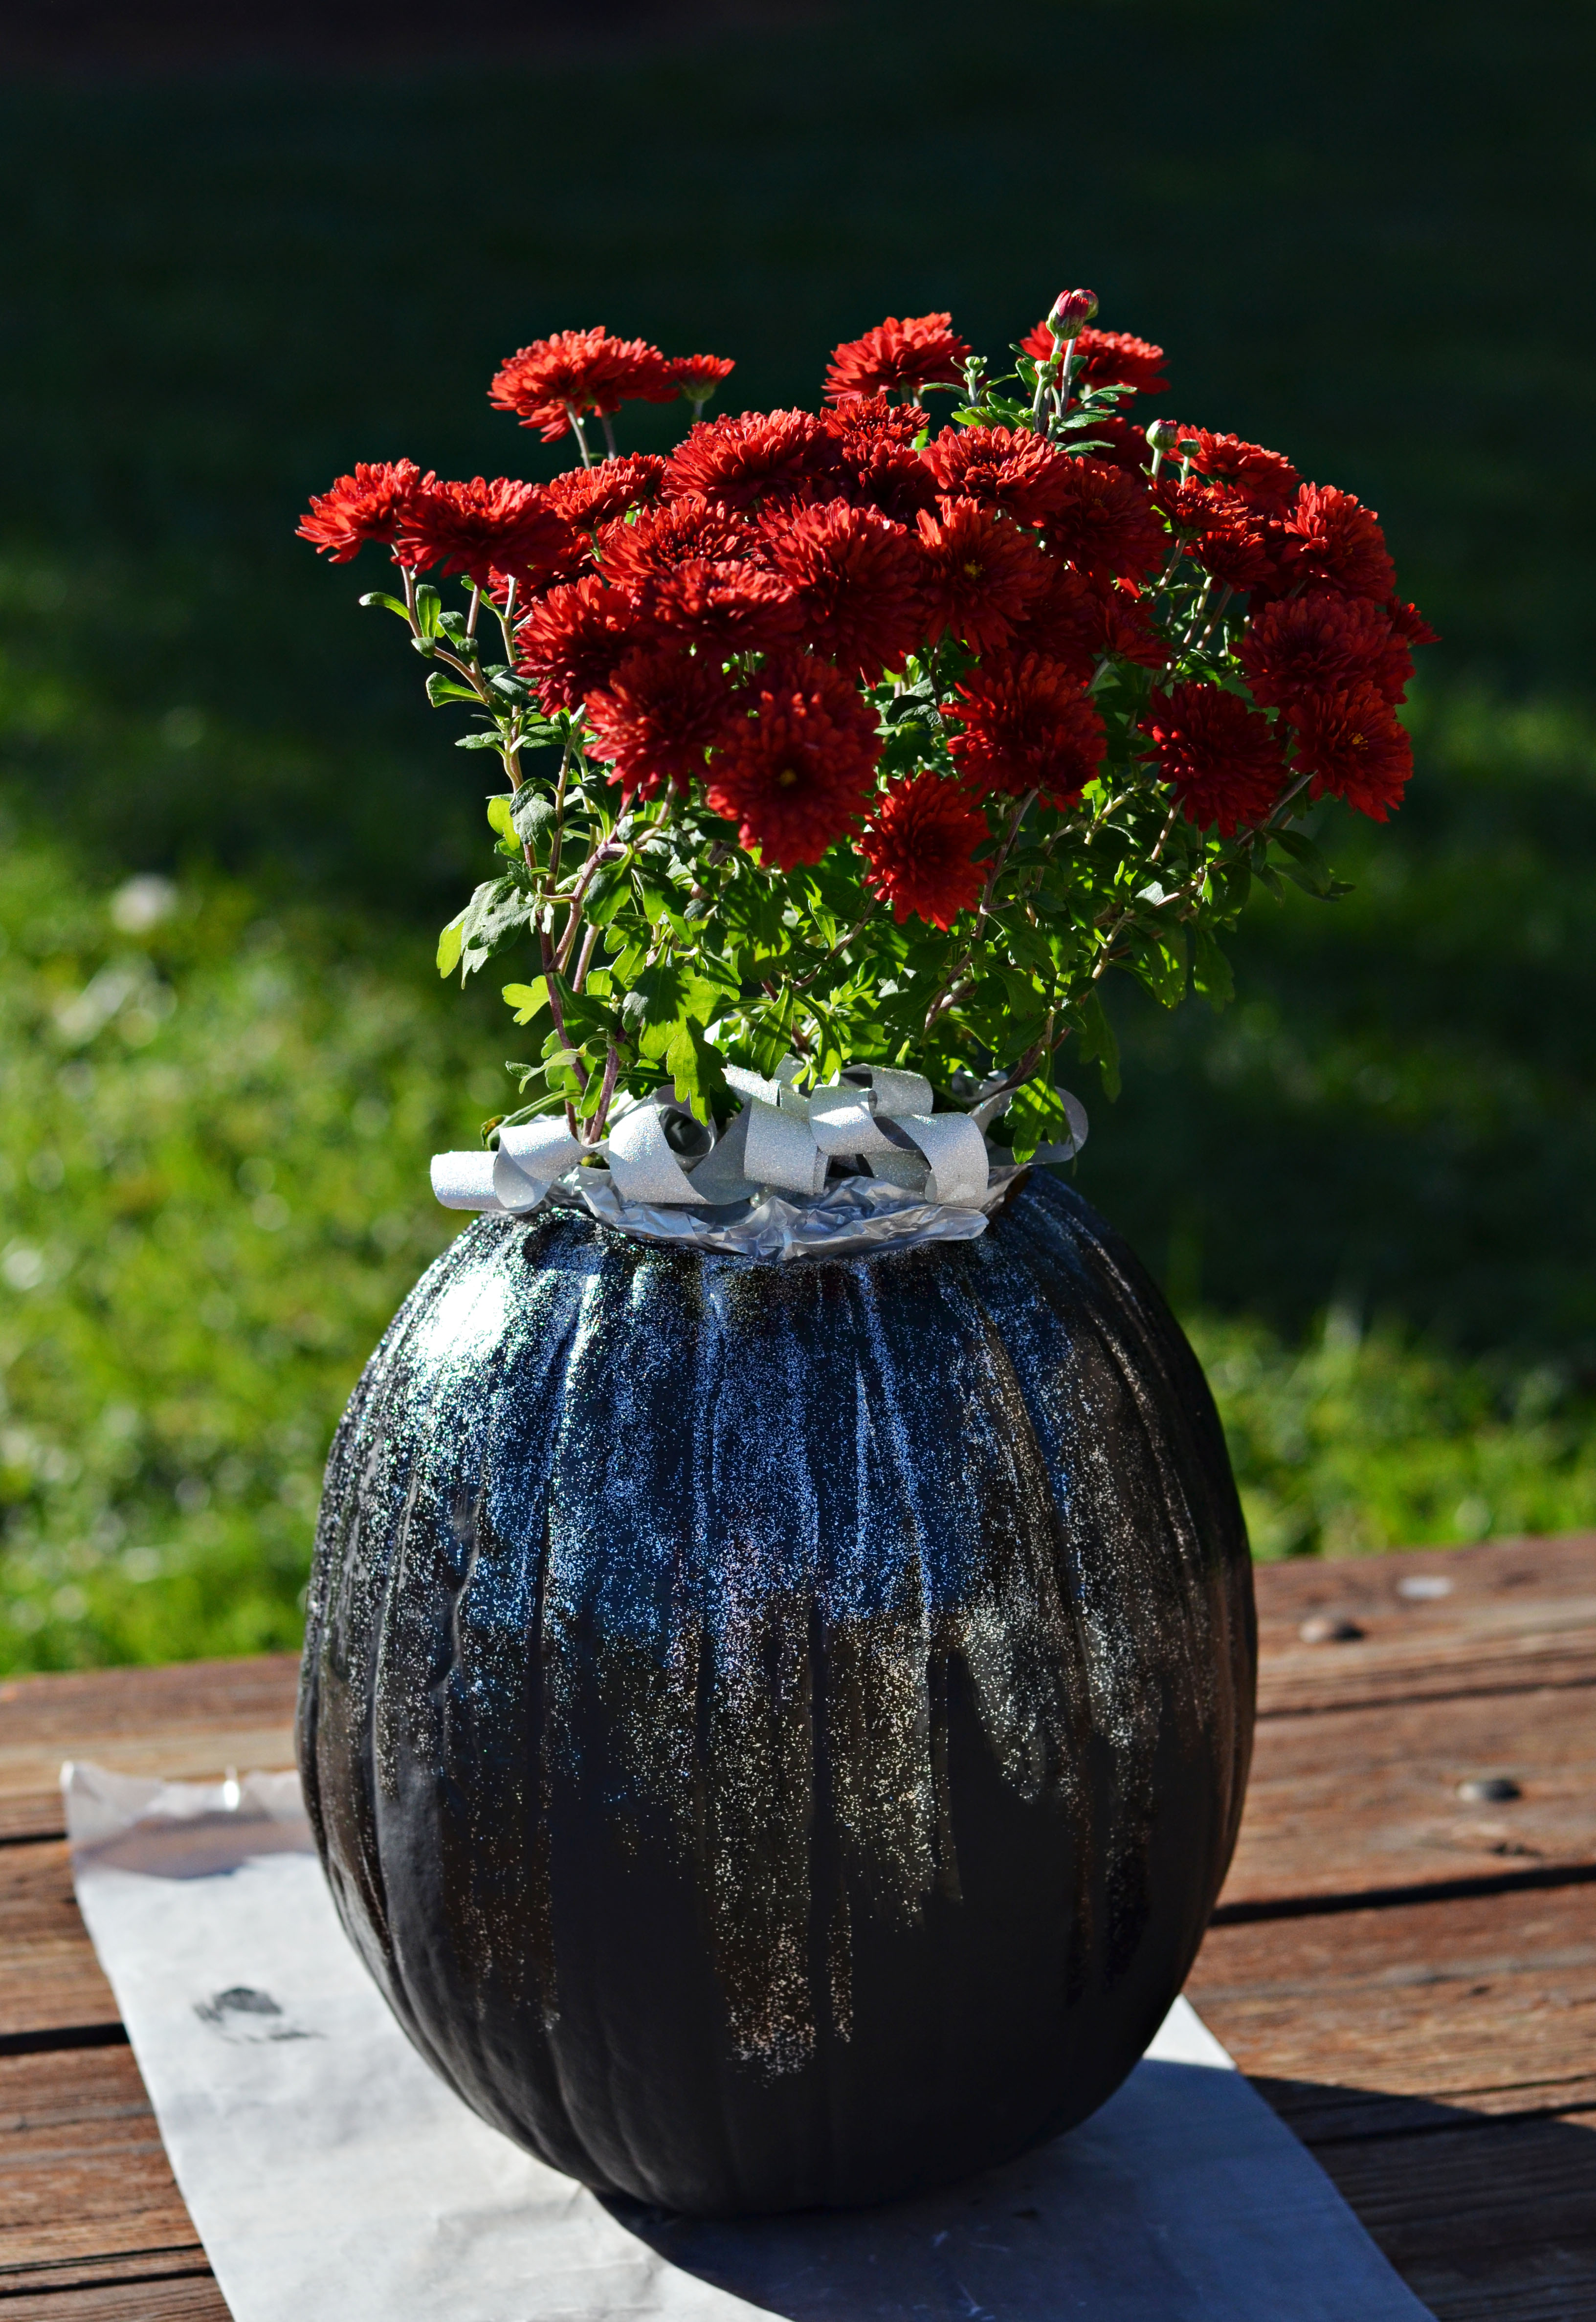
I think my mom’s color selection for this project was spot-on. The classic black with silver sparkles looks great with the pop of burgundy flowers. Very classy indeed!

